Week 3 and Baseline Demo!
Hey everybody, welcome back! In the final week leading up to the baseline demo, we worked on continuing our progress on everything we did in the first two weeks. For this week, we needed the same parts as before, with the addition of the an LCD for displaying pressure areas.
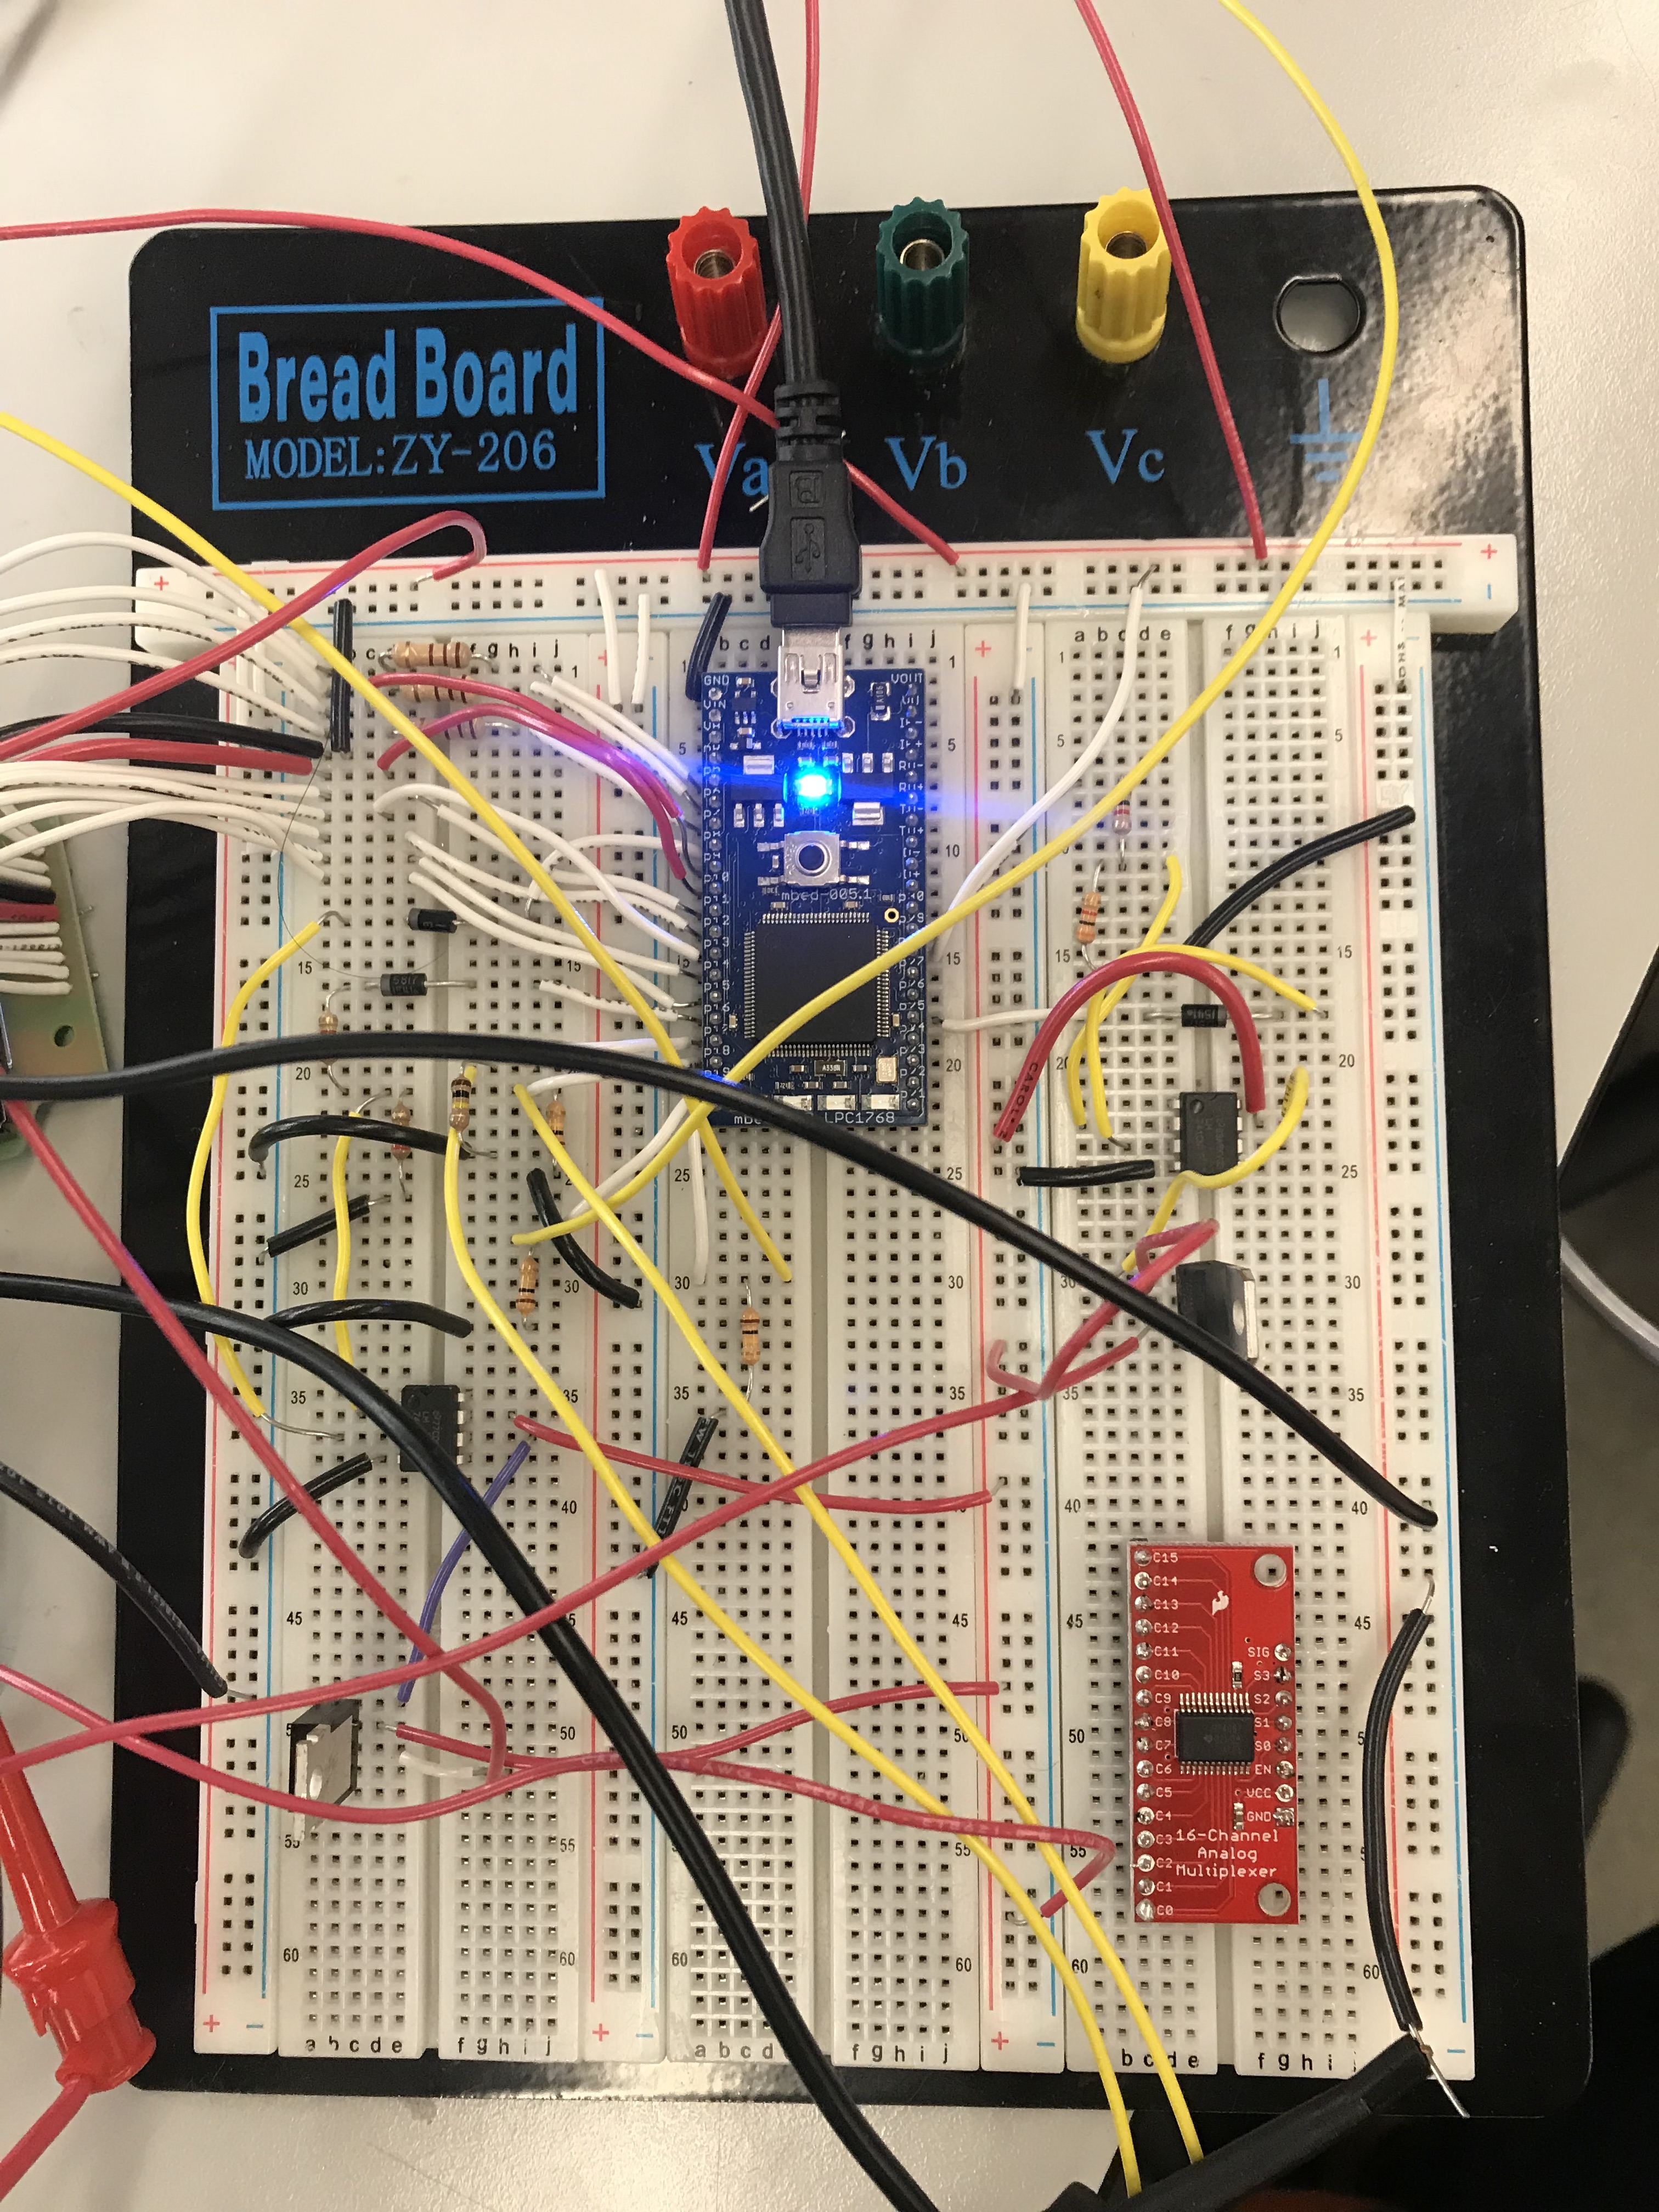
In this week, we first worked on making it so that we could cycle our motor with the mbed, which was our first baseline goal. This was done in a couple steps. We first hooked up the mbed port to an Op-Amp, in order to amplify the output to a higher voltage. Following this, we then hooked up this output of the Op-Amp to the gate of an NPN power transistor. Next, we cycled this port from the mbed low to high every fifteen seconds, in order to cycle the output of the Op-Amp from low to high and thus cycle the power transistor. Finally, we hooked up an external power source (since our motor pulled more power than a battery or the mbed could supply) of 12V and 3A to the to the Drain of the transistor and the motor to the Source. In doing so, we thus were able to cycle the motor through our mbed. This circuit can be seen below with the motor being hooked up to the transistor output in the bottom left corner:
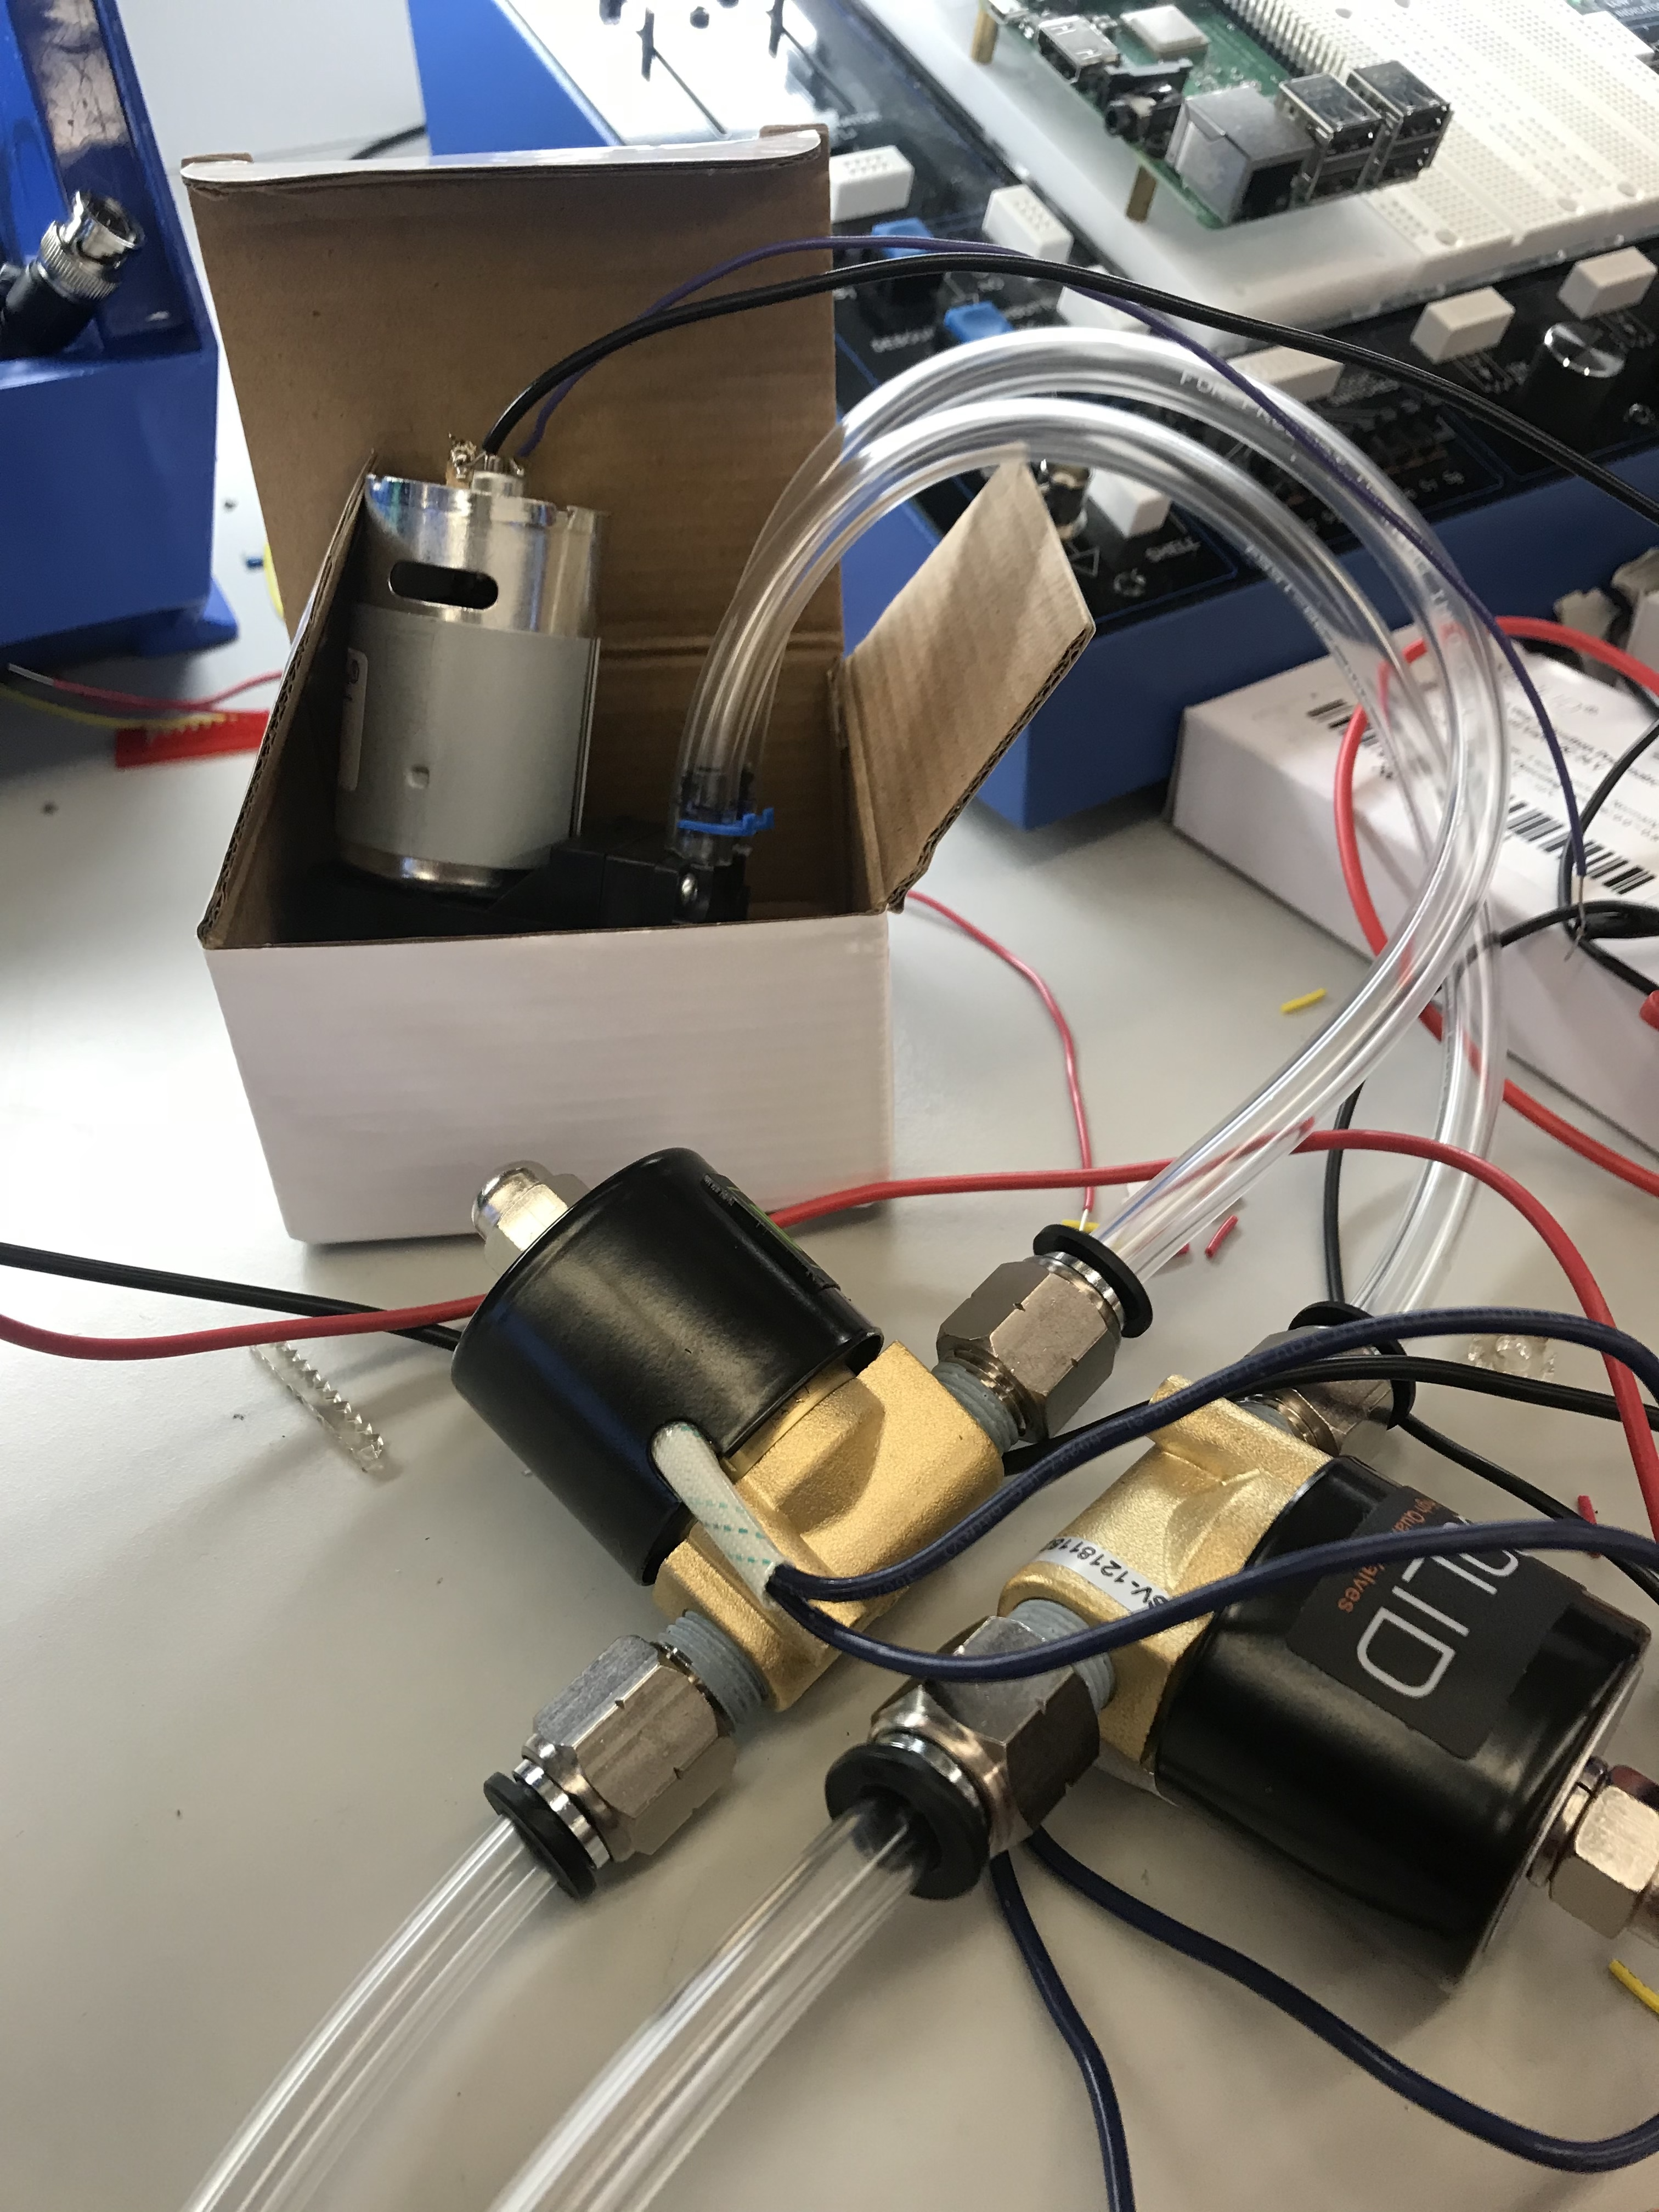
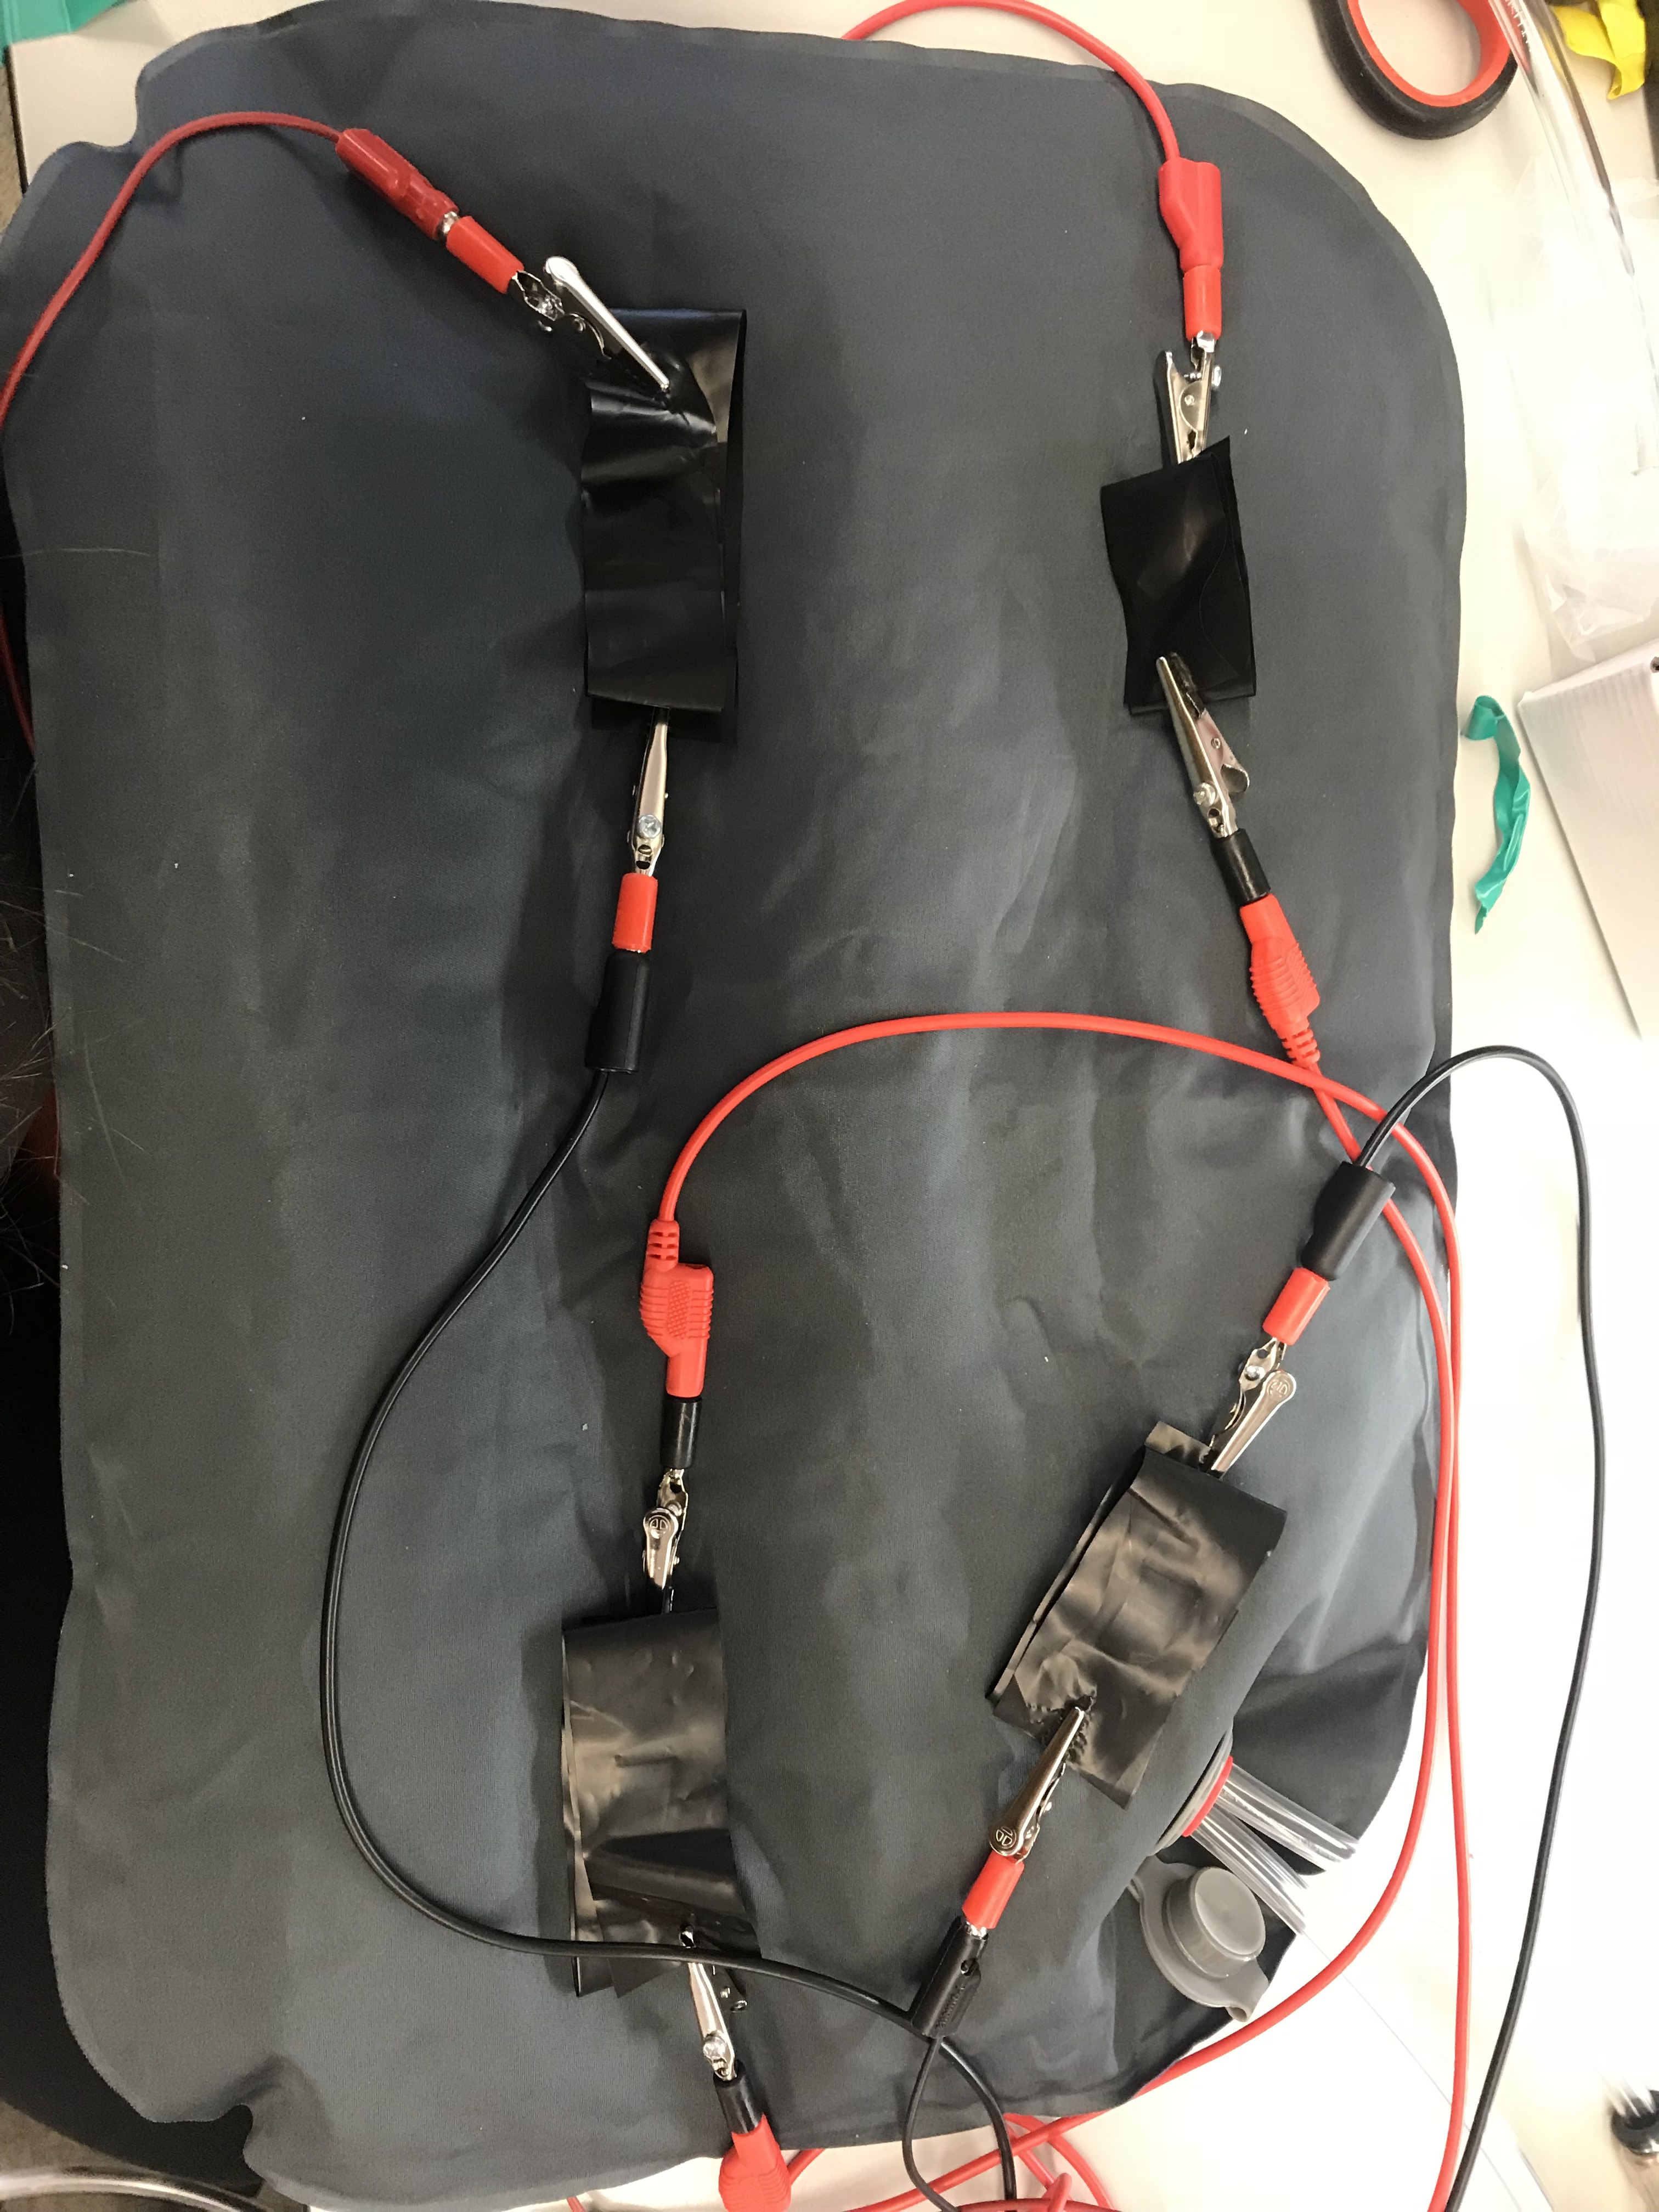
Next, we worked on hooking up both ends of the motor to the pillow in order to inflate and deflate according to the cycling of the mbed. Using the 3D printed part from last week, this was relatively simply outside of cutting the tube. In order to cut the tube, we had to go to the machining lab to ensure that the tub was cut perfectly flat to ensure air tightness. Once the tube was cut, we hooked up the output of the motor to the pillow as can be seen in the two pictures below (with the tube in the pillow of the bottom right of picture 2):
Next, we worked on using our pressure sensors to actually measure the pressure on the pillow. Using what we had in the week prior, we calculated the range of our pressure sensor values, and found the resting mean at the start before any pressure was applied, in order to then calculate when pressure was applied as the values changed. Once this was done, we were able to use the LCD hooked up to the mbed in order to actually visualize the pressure. This can be seen below in the final picture from the week:
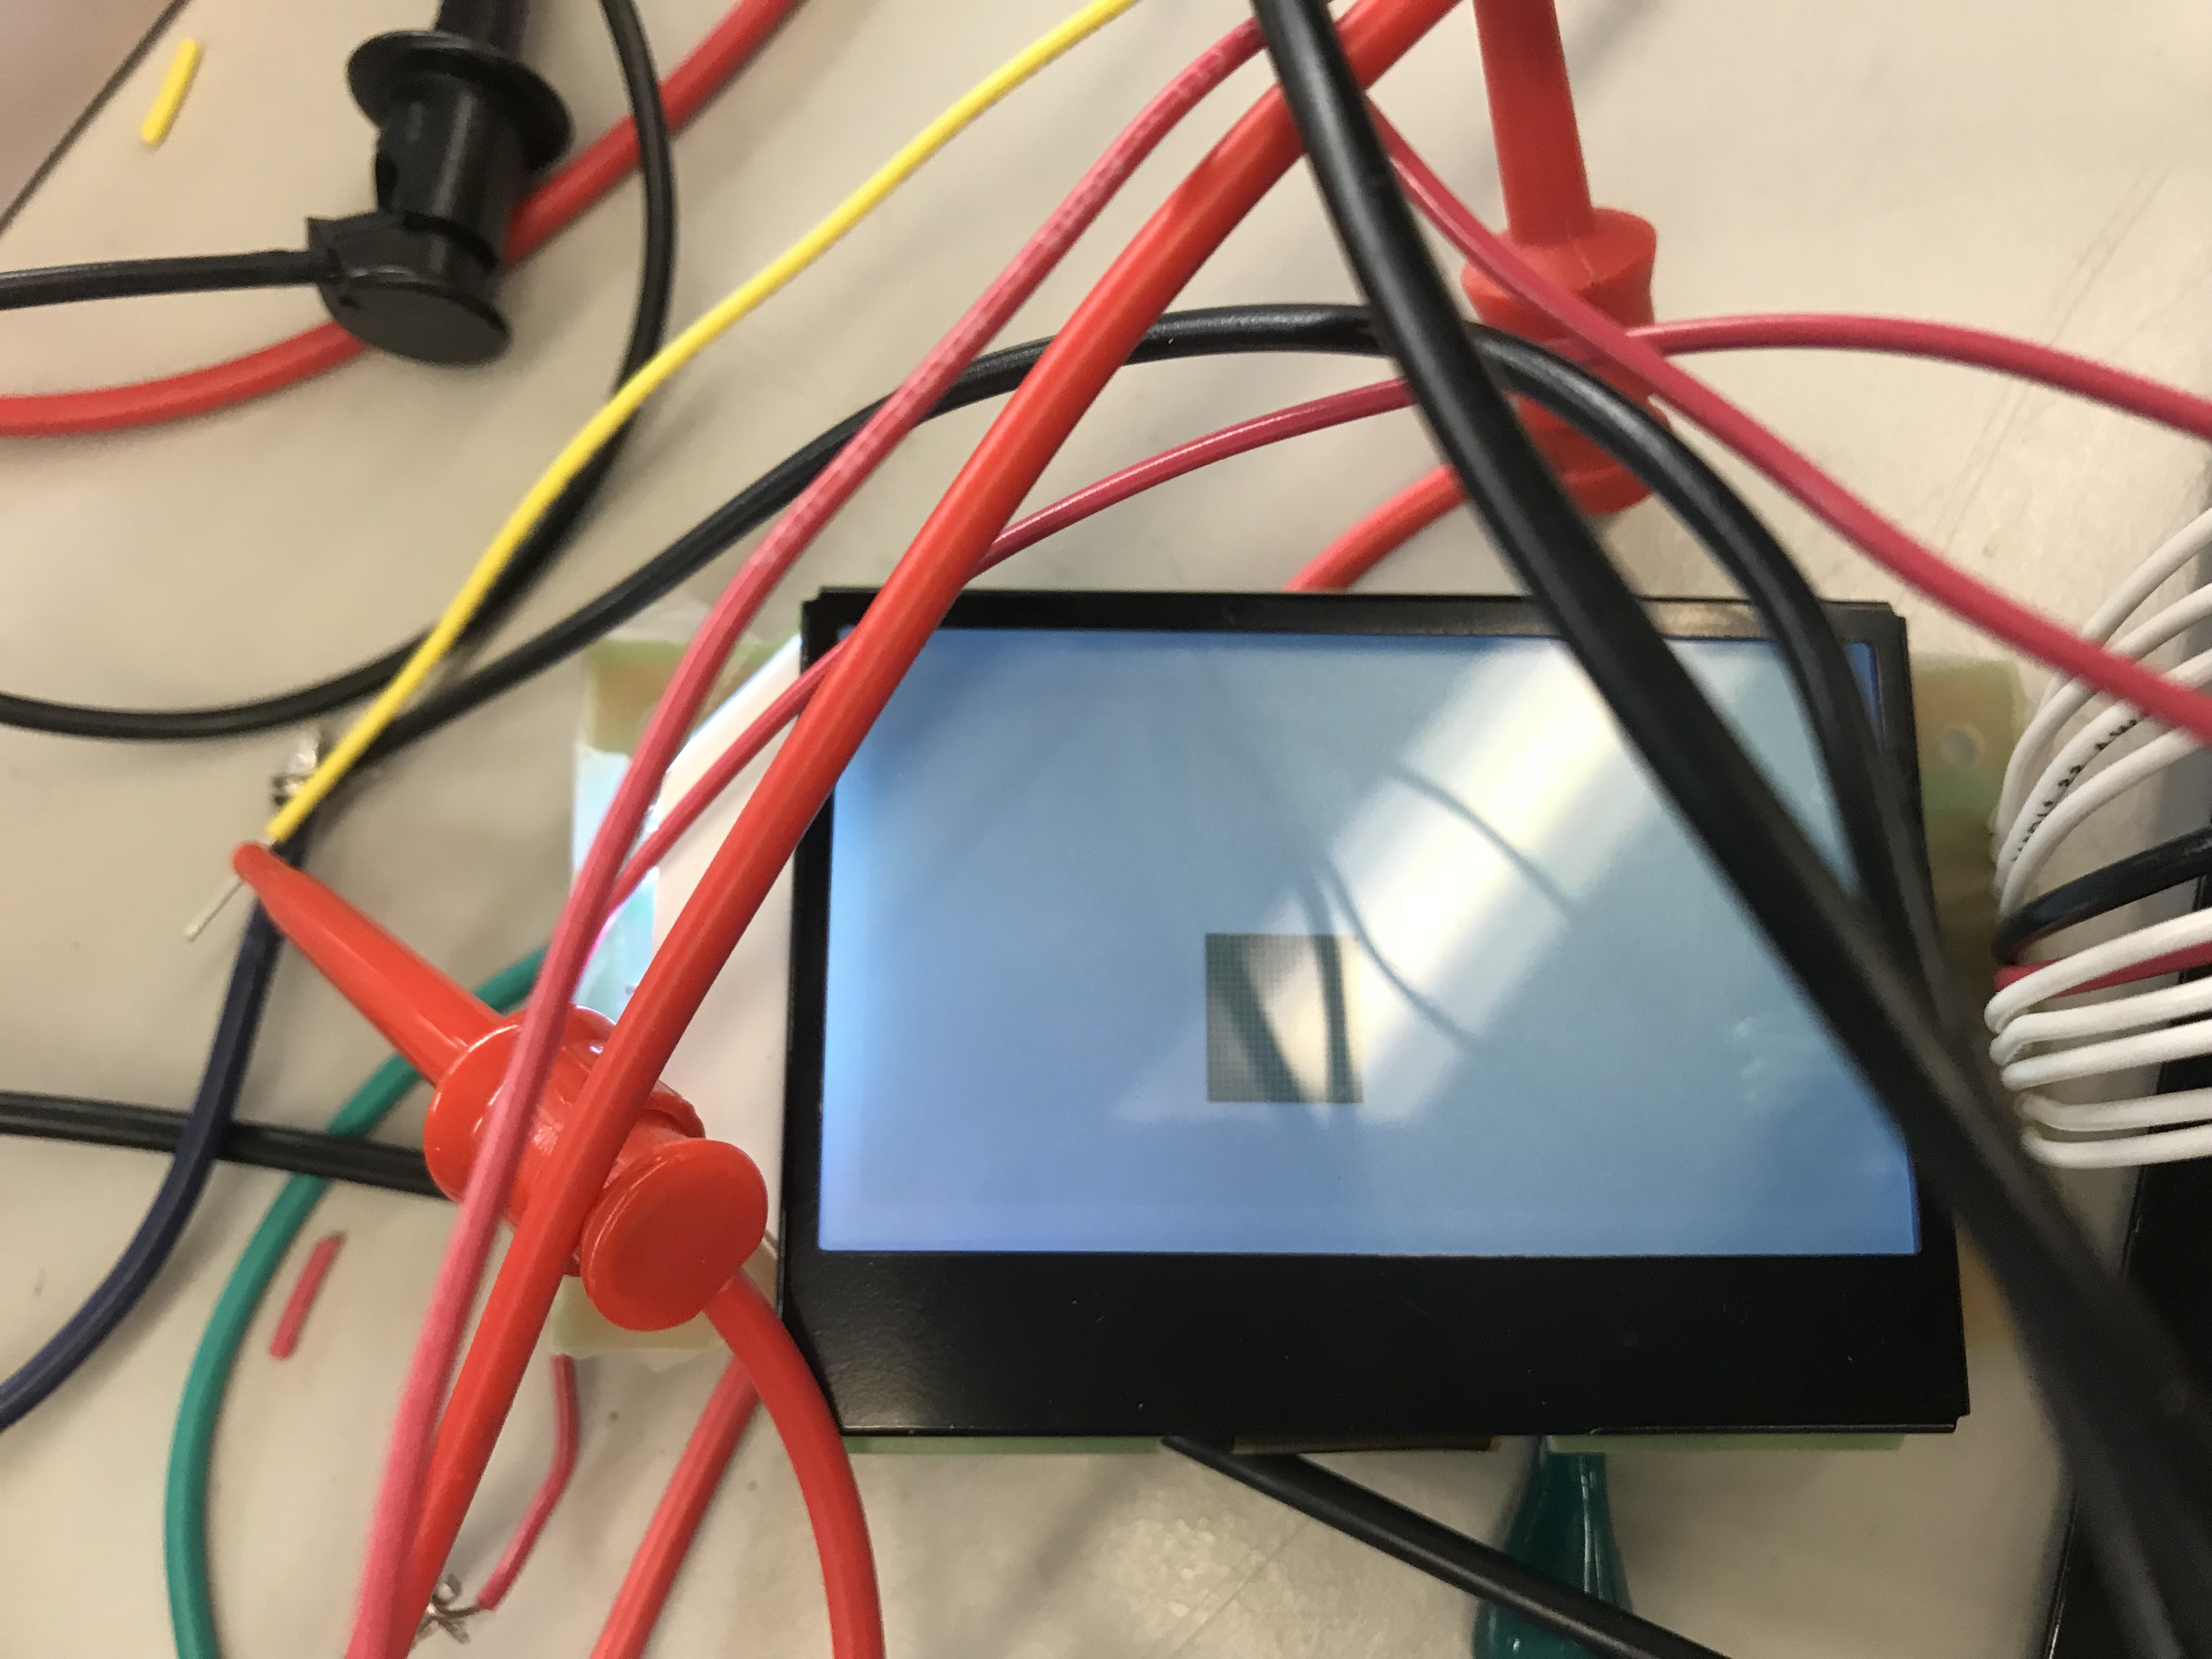
In terms of actually hooking up the LCD, we had to follow the steps we did in lab 3 with some slight adjustments in moving from the arduino to the mbed. We had to use different pins on the mbed, pins corresponding to the SPI protocol for the mbed. These pins were p11, p13, p15, p14, p12, used in place of the five pins we used for the arduino. Once this was done, we had to actually translate the code from arduino to mbed, and once we finished that, we were able to finally display on the LCD.
This week while overal difficult, ended up working out as we were able to succesfully accomplish our baseline goals. With that said, we have a lot to work on moving forward. First, we need to completely change how we measure pressure as our current method is not practical for a real pillow. Second, we need to move from a single chamber pillow to multi chamber going forward. Finally, we need to work to clean everything up in order to make sure that someone could actually sleep on our pillow. With all this said, we look forward to updating you next week!