Week 4 and Reach Demo!
Welcome back again everyone! It has been a long week with almost no sleep, but we finished!
This week, in moving from our baseline to reach demos, we had three main things that we worked on. Revamping our pressure sensors, moving to multichamber inflation, and cleaning up our product. In terms of new parts needed this week, we needed:
- Copper foil for our pressure sensors
- Smaller pillows for our multichamber pillow
- 3D printed parts to split the tubing from the blower
- A new air compressor that was larger and more powerful.
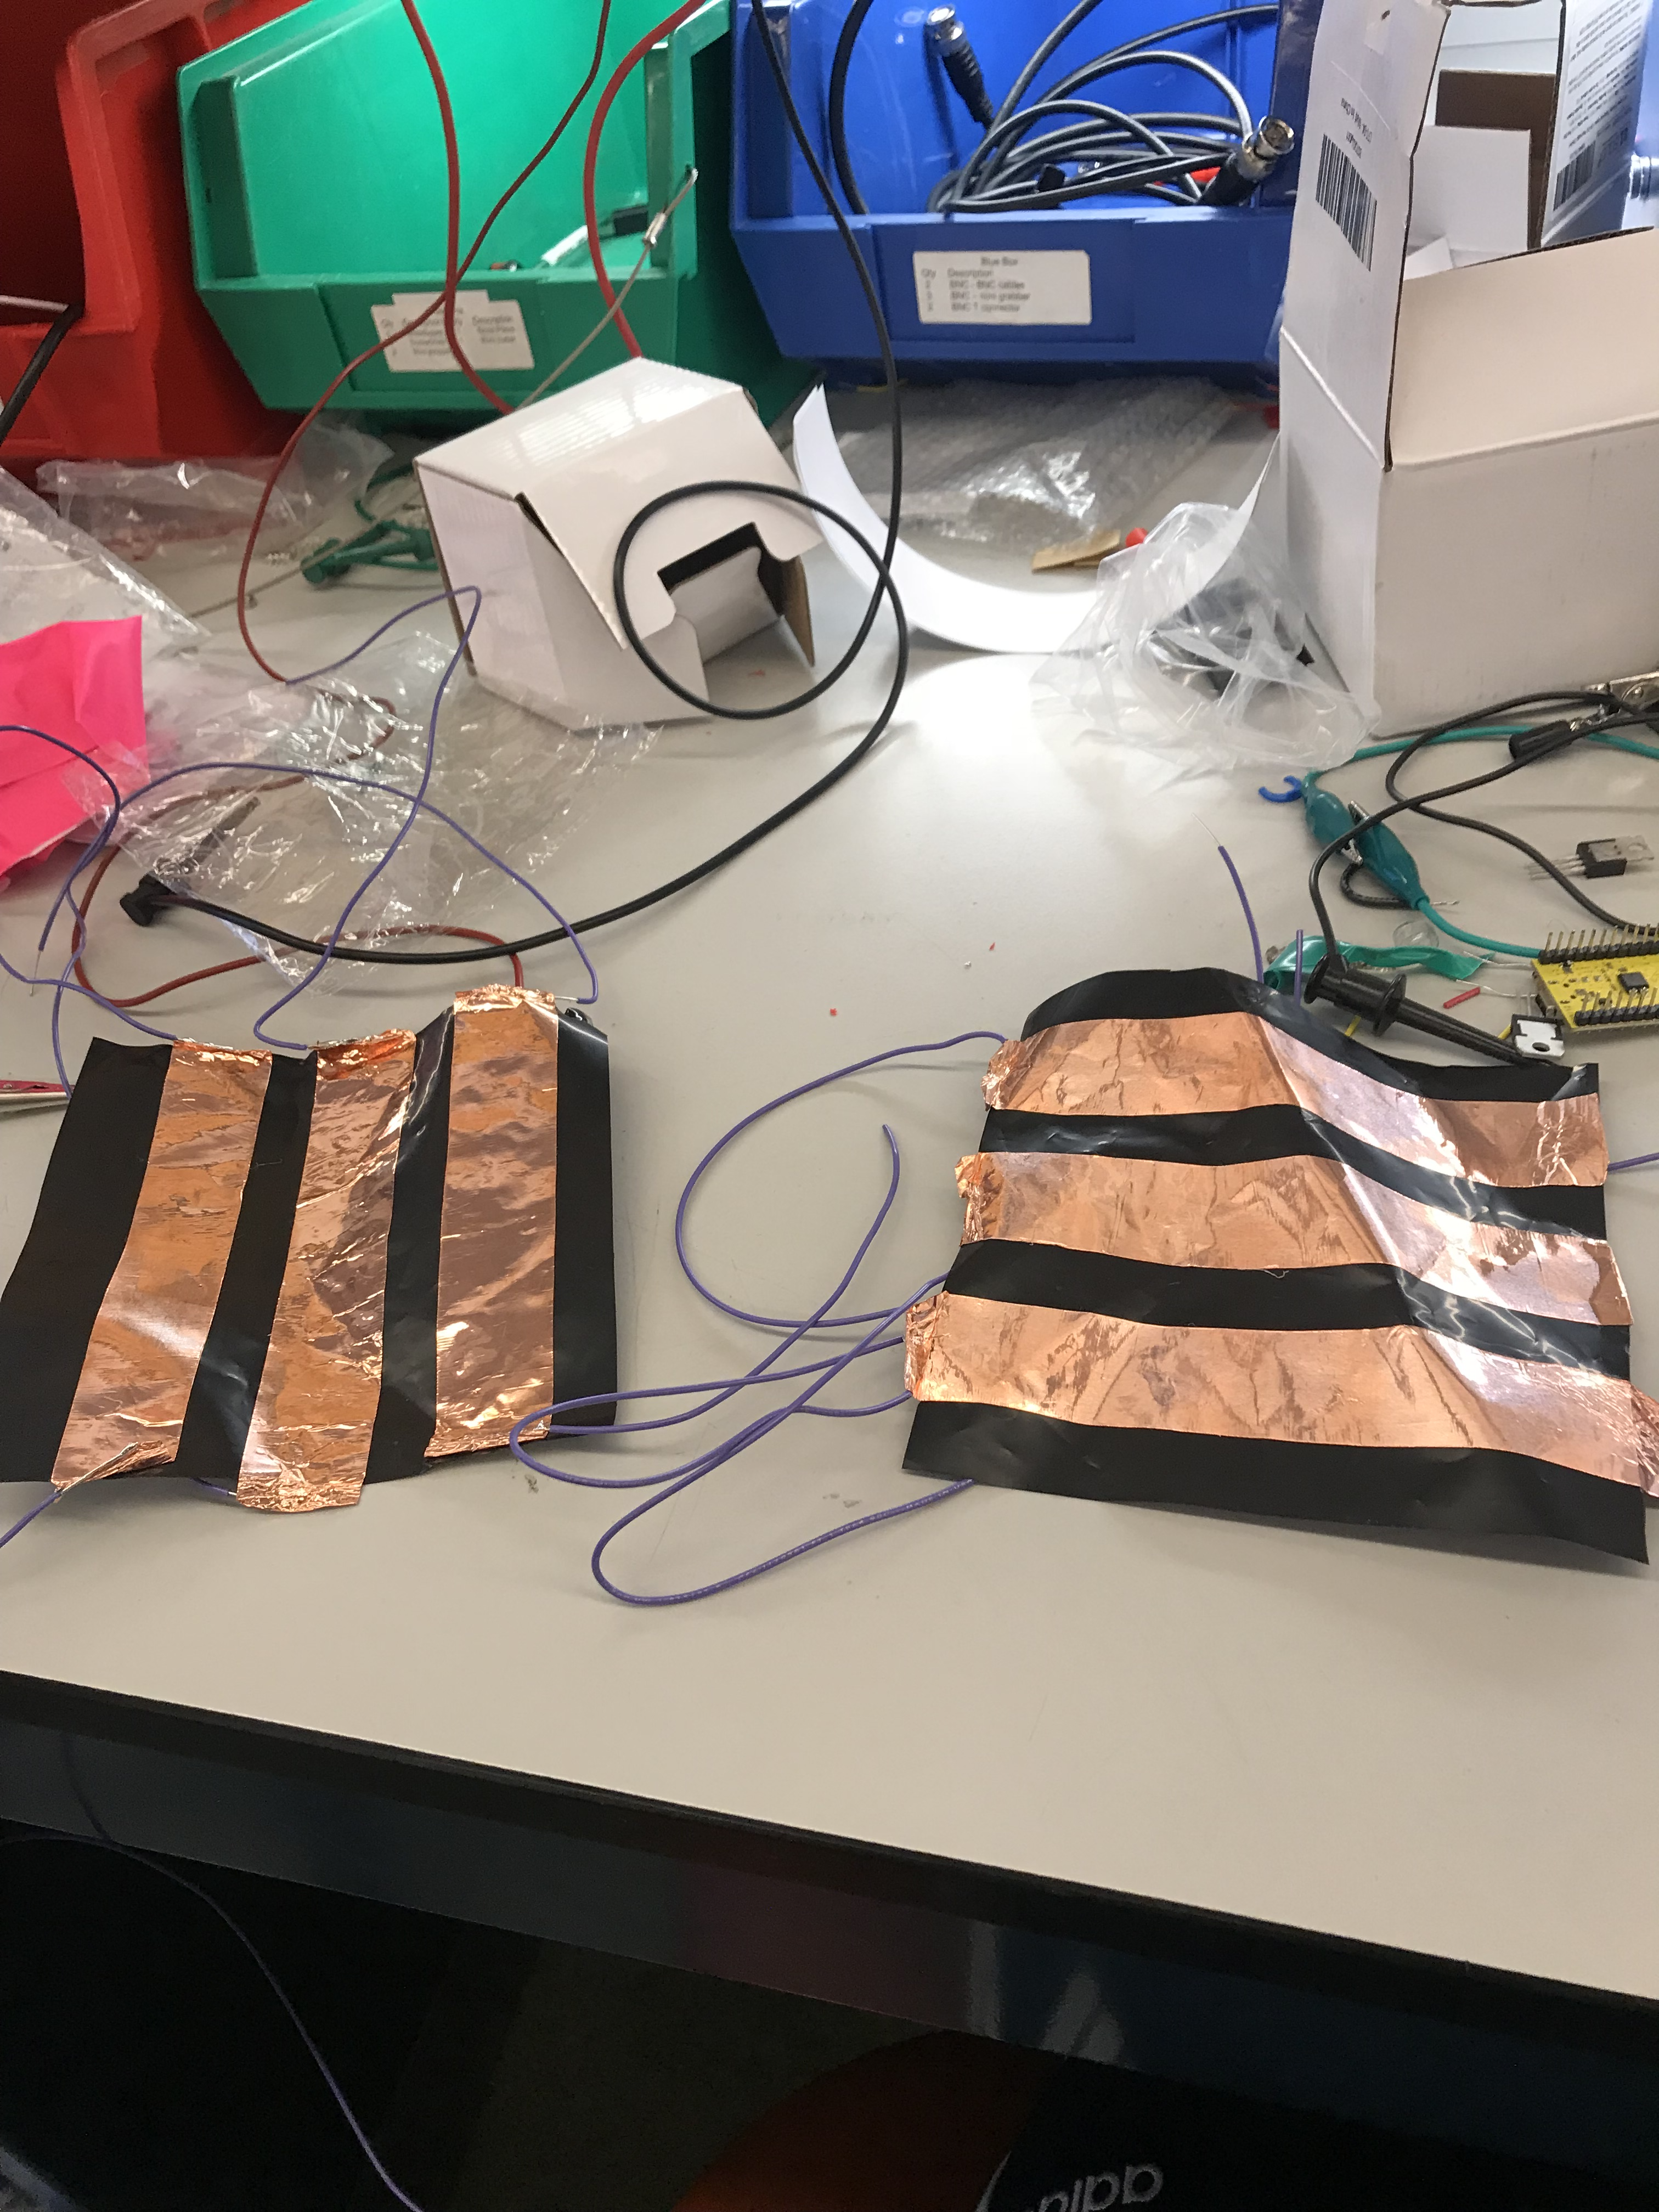
For the first goal, we realized that needed to use the sheets flat instead of folded, and that we needed to find a way to attach wires (not banana clips) in order to cover more surface area and make the pillow actually useable. We realized, that using copper foil alongside the pressure sheets, we could accomplish both. We first made a small prototype before we created the larger one for our pillow. What we did was we layered two sheets with three rows each of copper foil, put these rows perpendicular, and then put a pressure sheet inbetween them. Next, we soldered wire to the ends of the copper foil and hooked up 3 ends to power, 3 to the analog out, and 3 to ground. The power end and ground end were opposite one another, with the analog end perpendicular to them. This can be seen below:
Once this was all done, we hooked this up to the mbed in order to measure pressure. This was done as follows. The pressure sheets layed on top of one other create a voltage divider for each power column, so what we did was send power to one of the columns, measure the analog out at the three outputs (one for each row), we then sent power down the next column, repeated the process, and finally sent it down the last column and repeated the process. In doing so, using the fact that these were voltage dividers, we were able to traingulate the position of the pressure using math based on the analog values out. Once we got the prototype working, we moved on to a much bigger grid, that can be seen below.
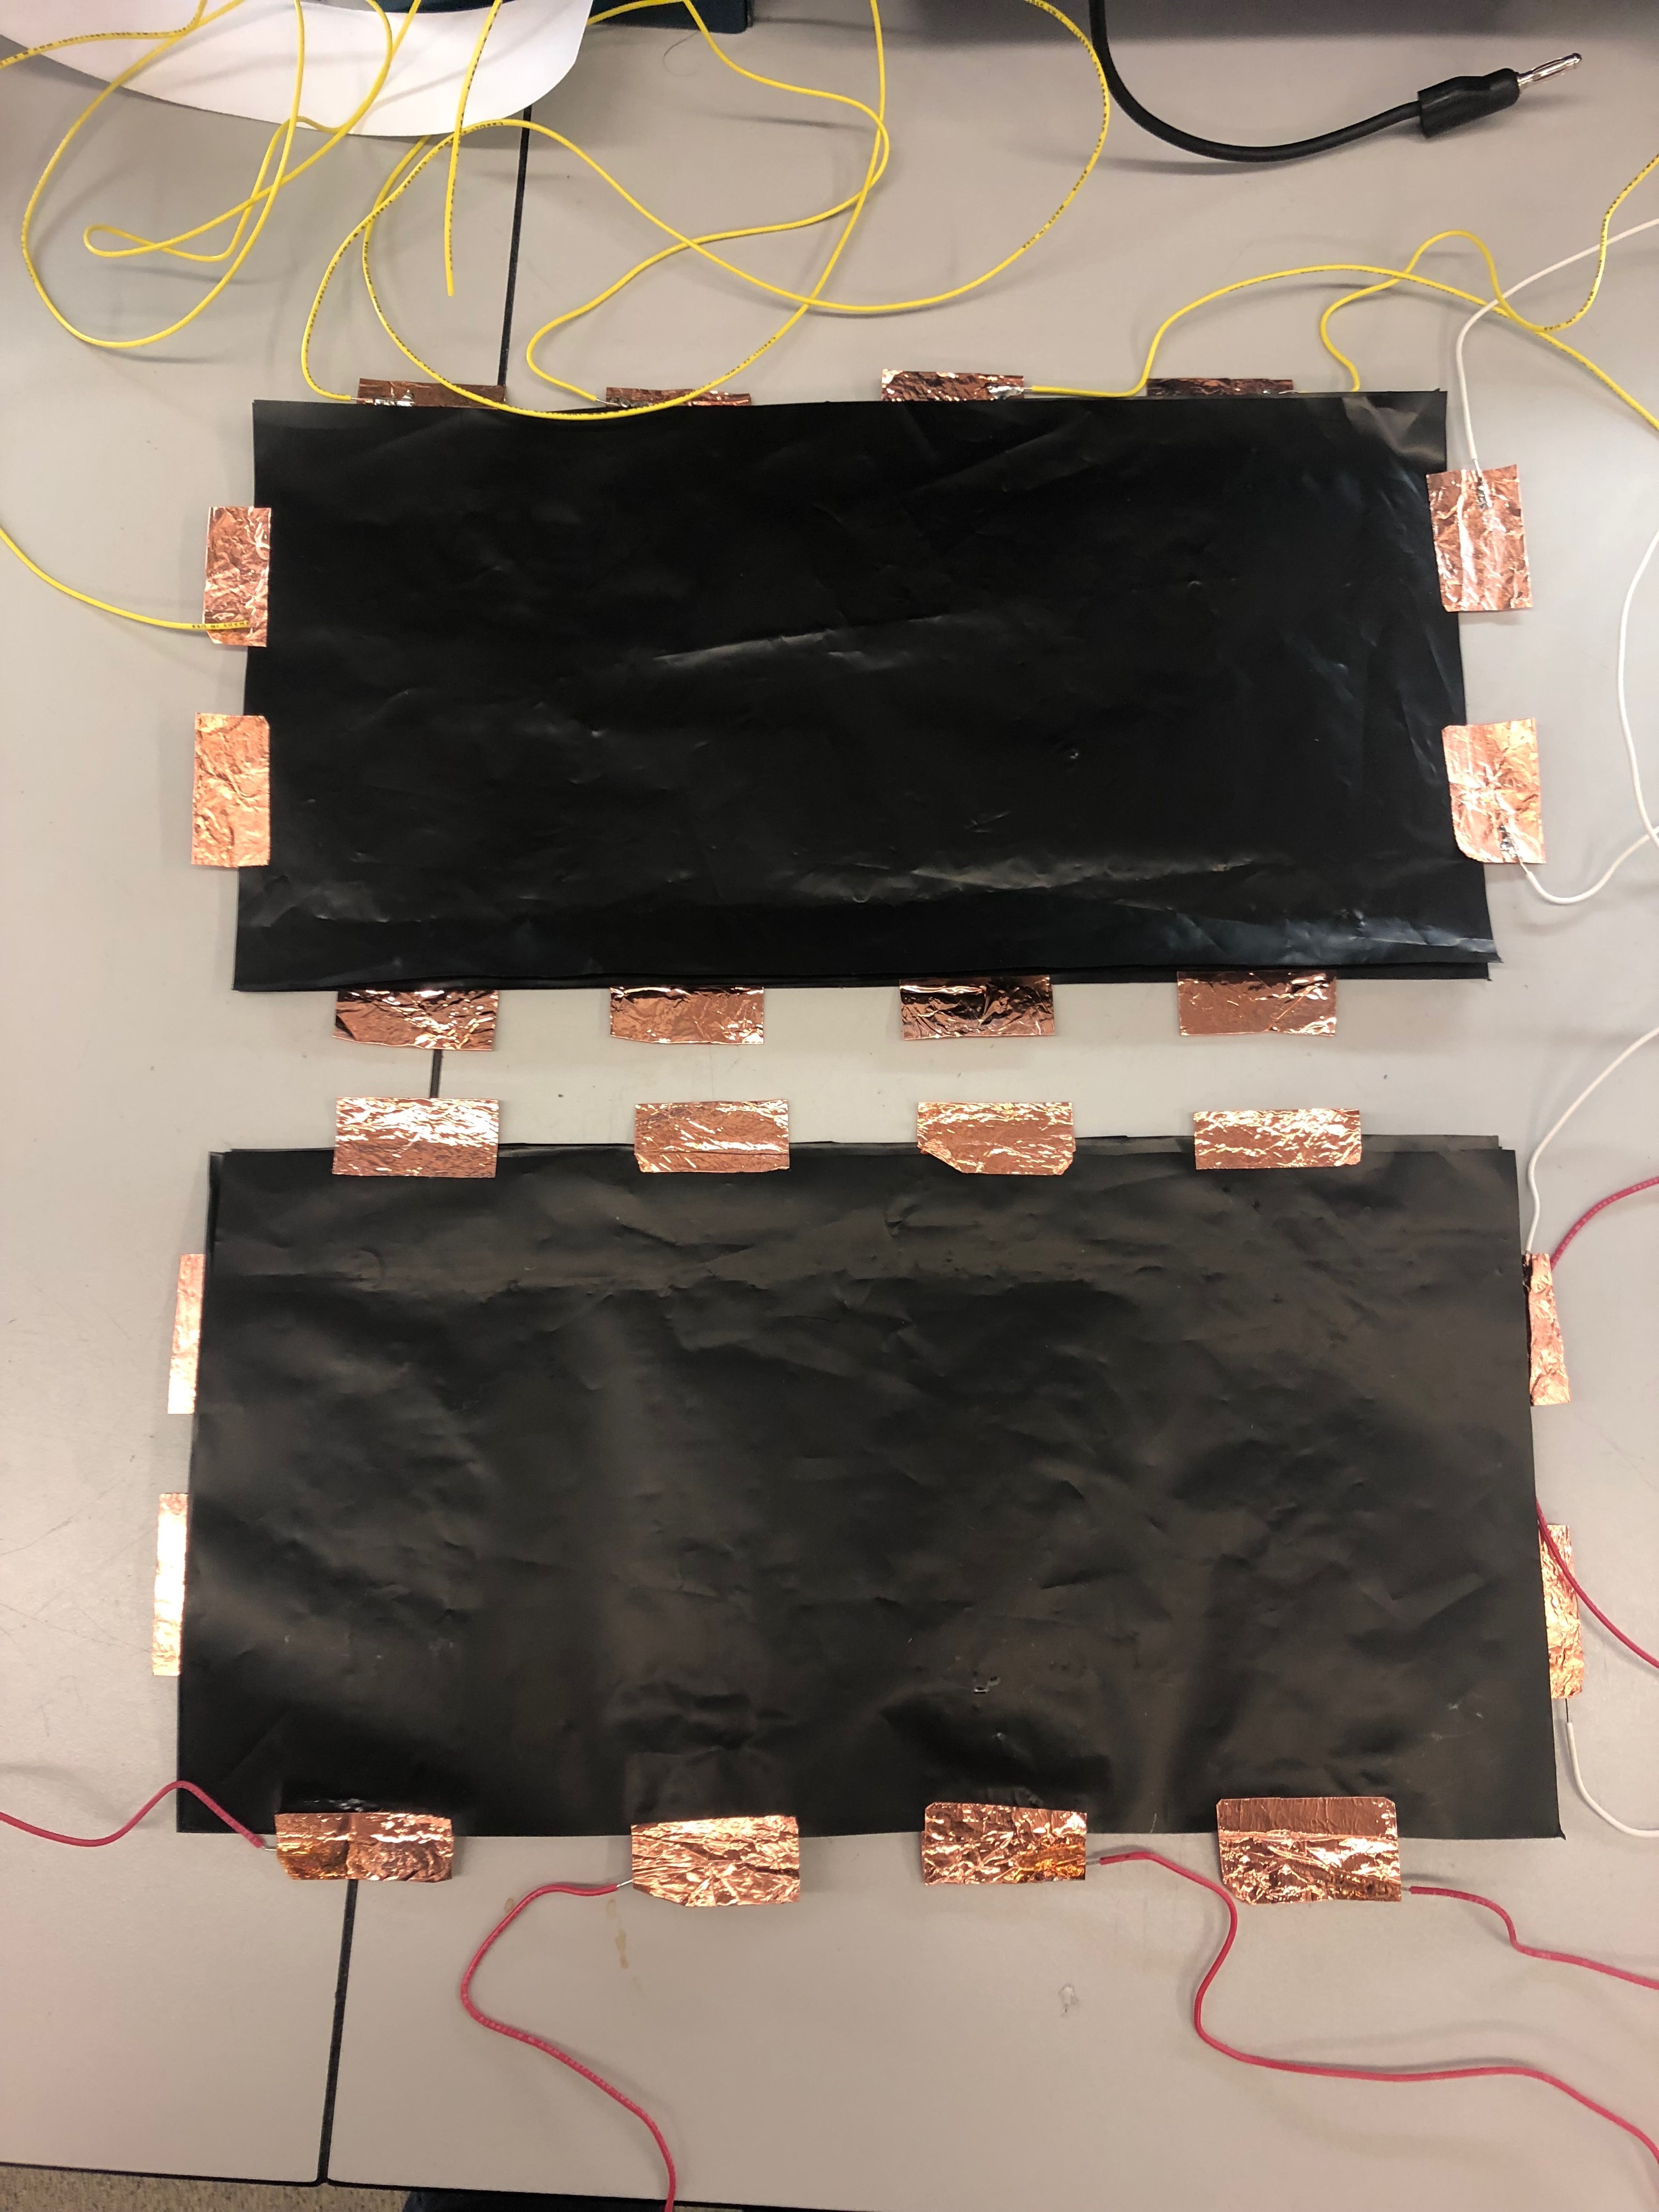
This grid had four rows and four columns, in order to be more accurate in determining the position on the pillow, as well as be larger in order to cover more space. With this done, we moved onto working on integrating the smaller pillows. This was done through using solenoids and the smaller pillows alongside our 3D printed parts. These can be seen below:
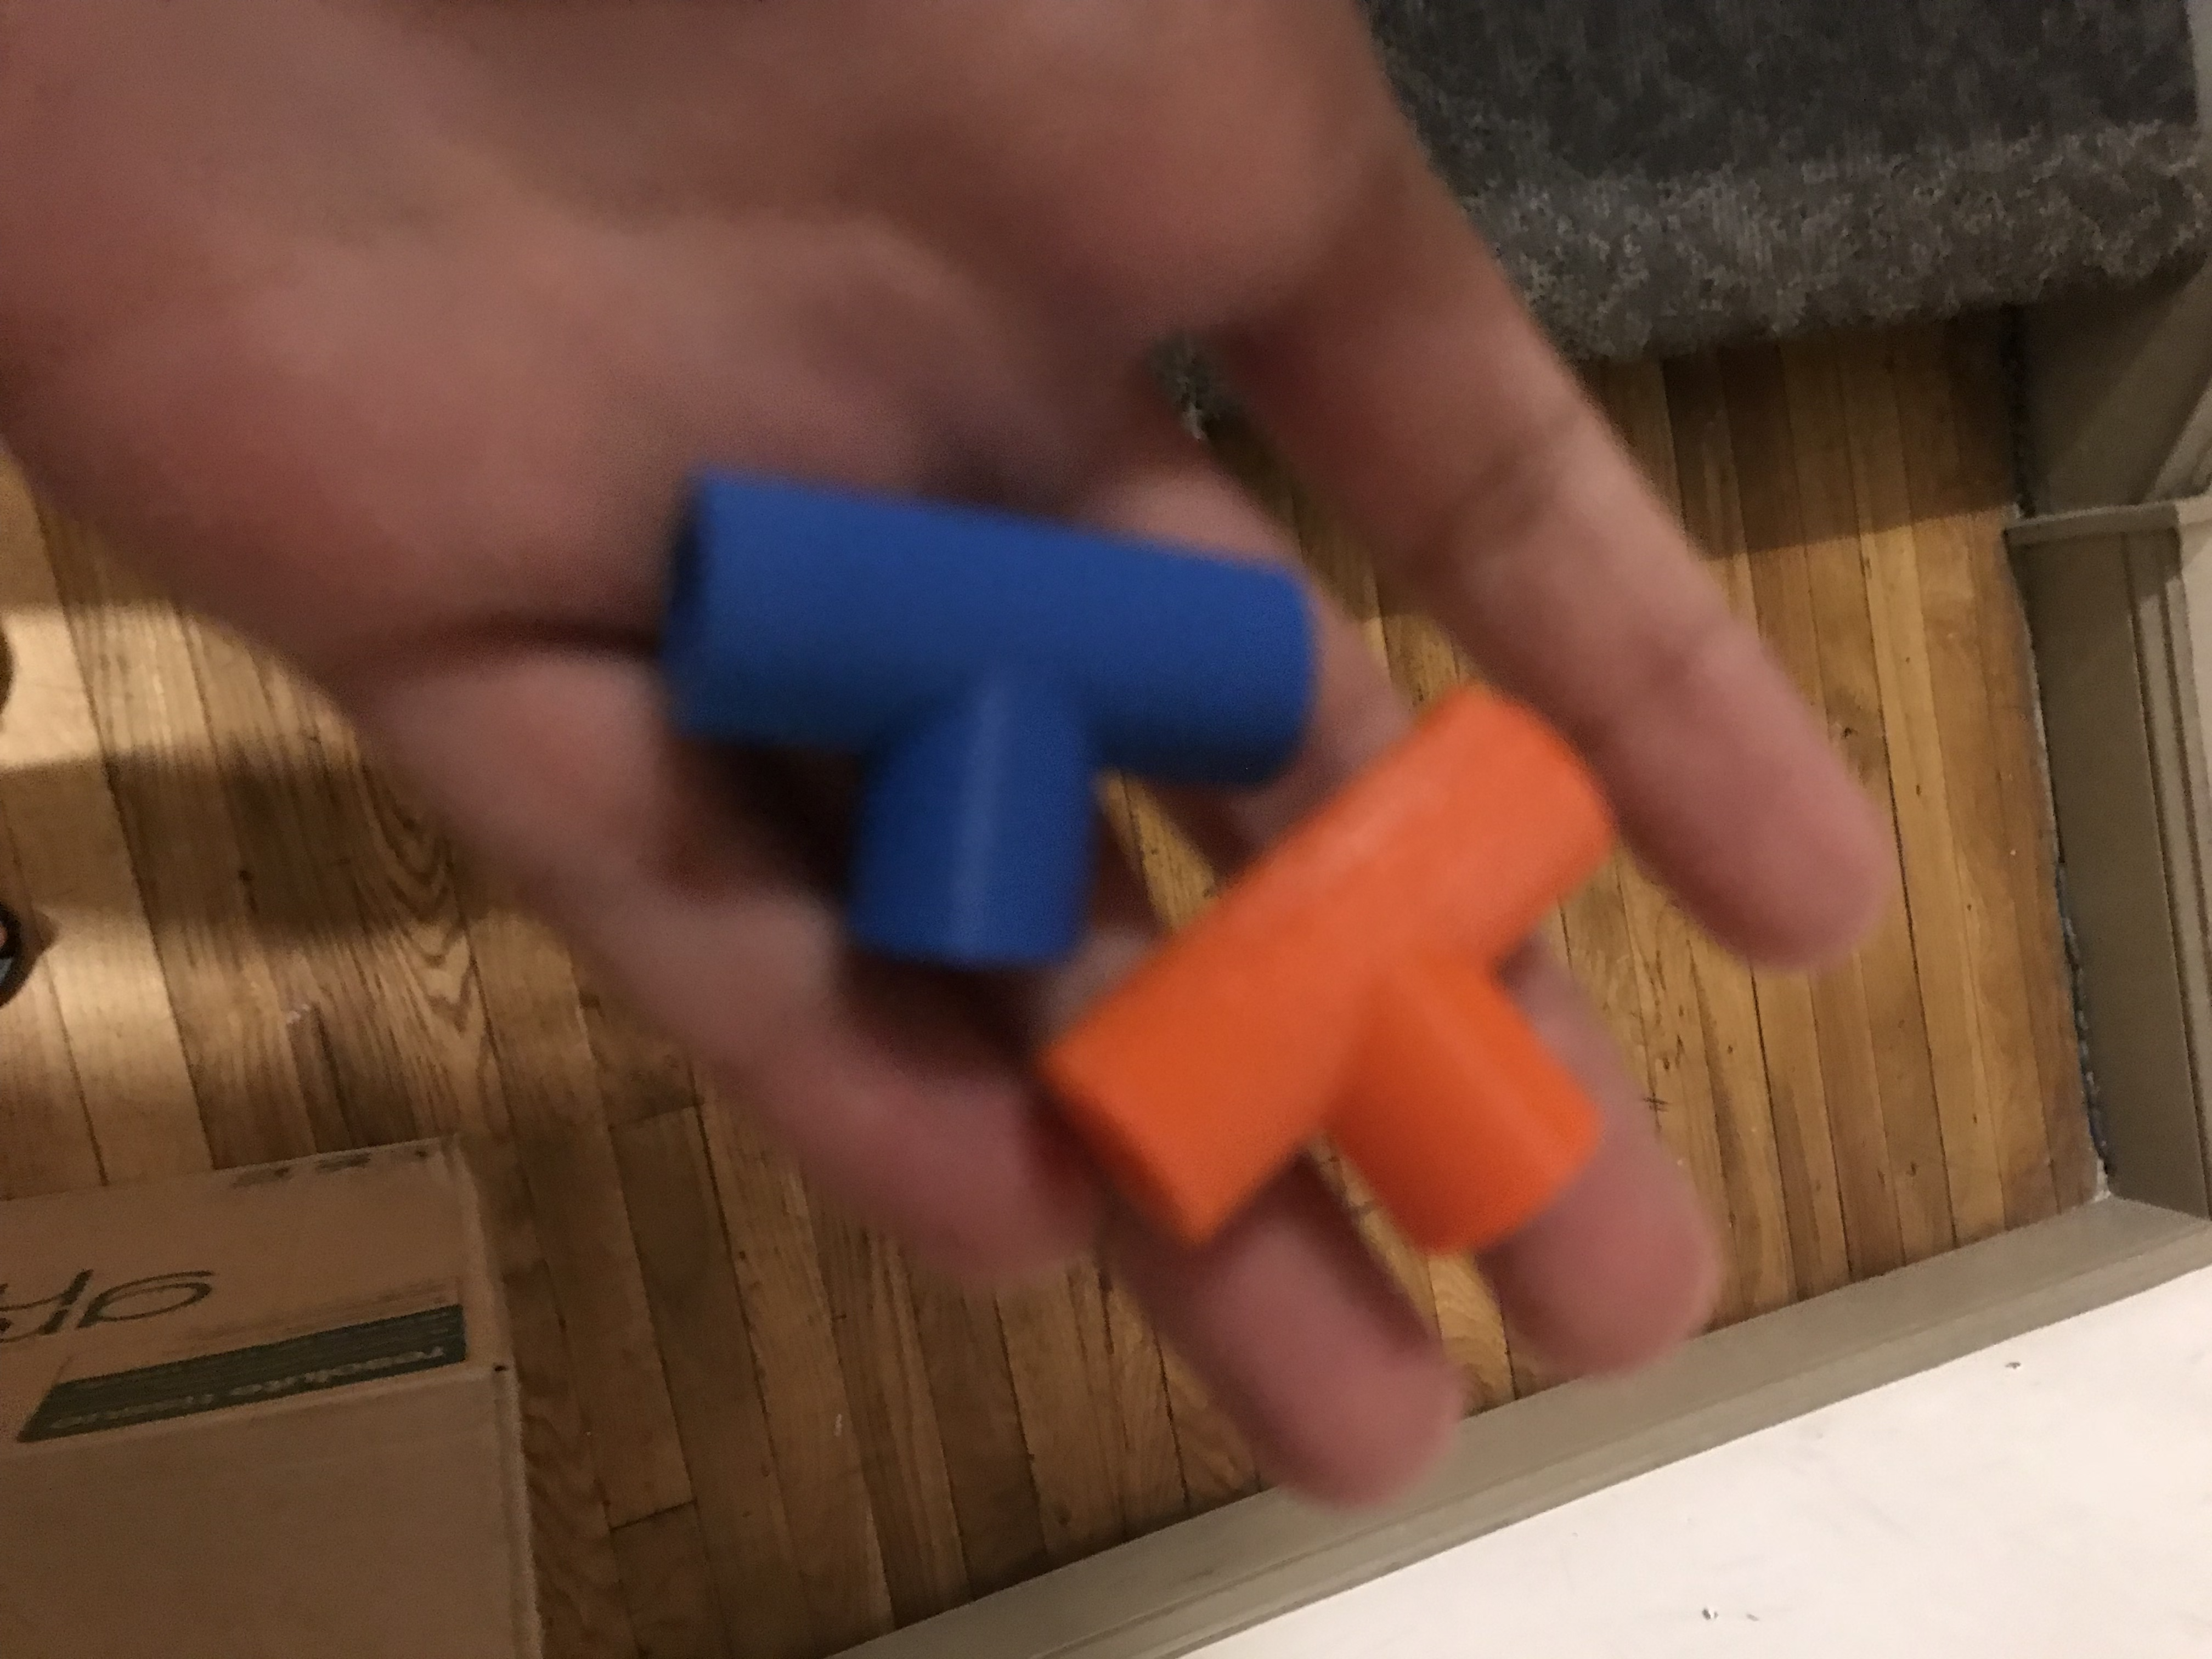
These parts were created in order to put one tube in with air and two tubes out carrying the air. Meanwhile, for the actual pillow we put together four smaller pillows, alongside tubes into the four pillows. This can be seen below:
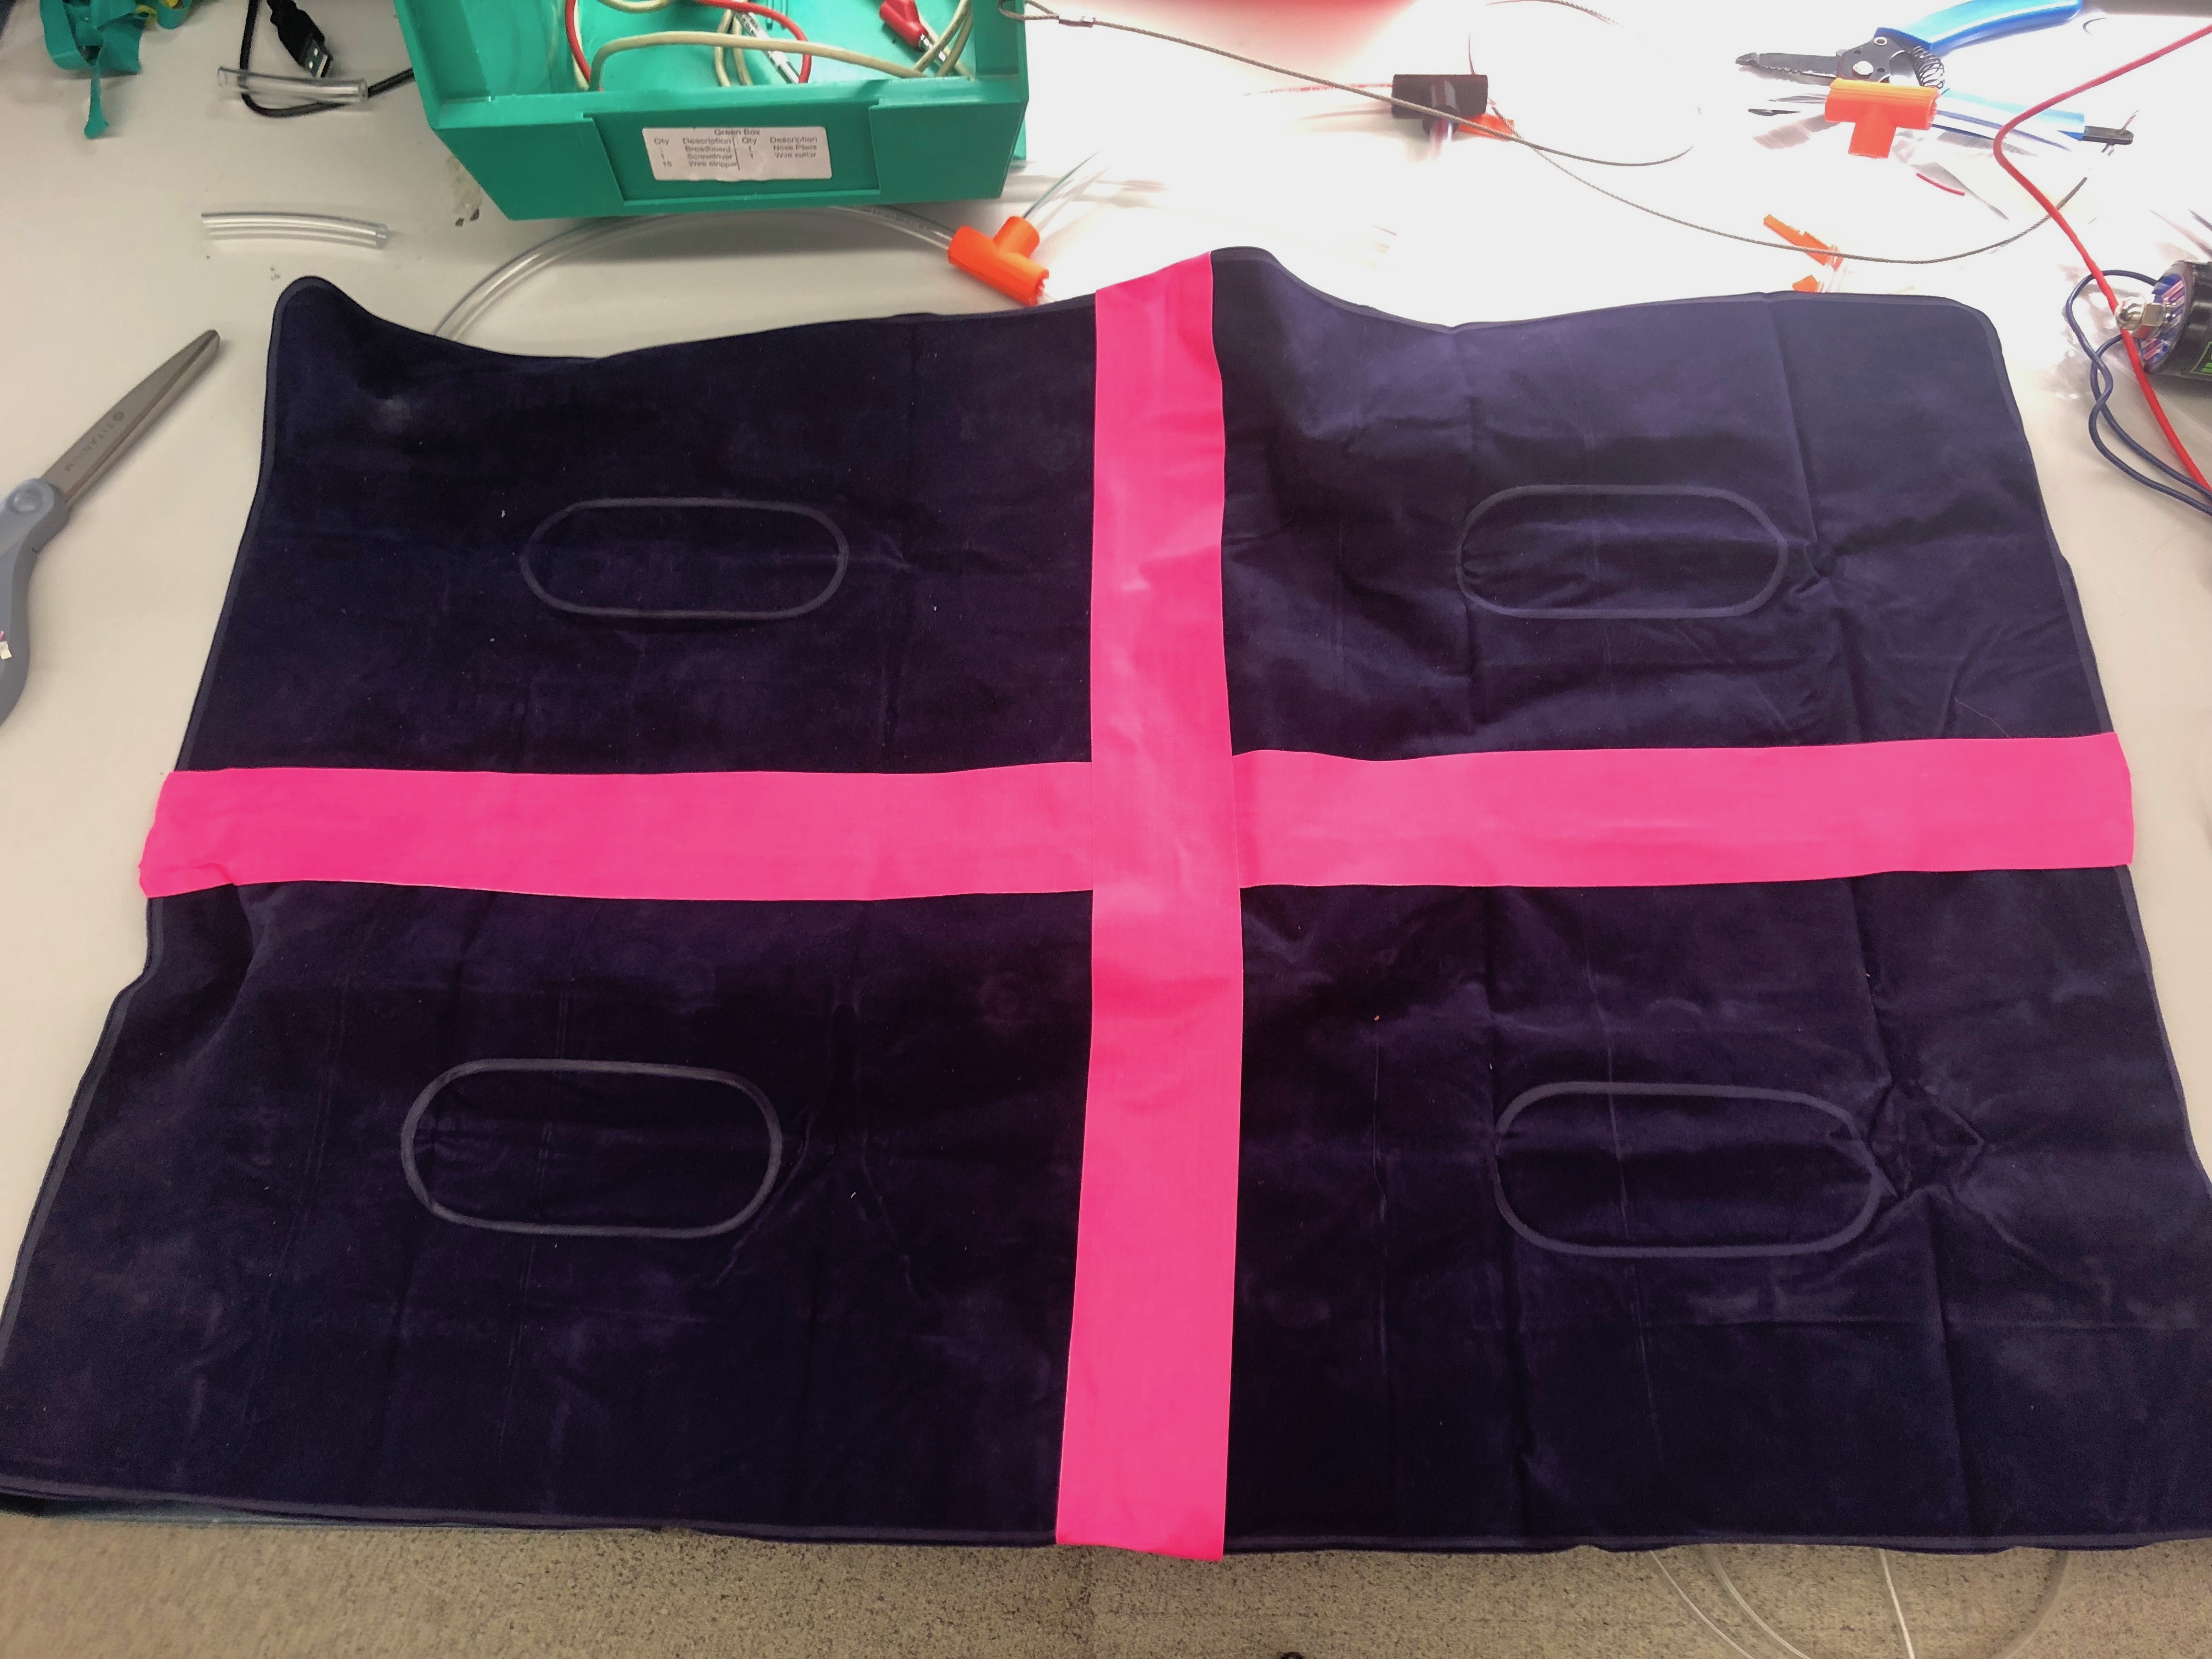
Once this was done we then actually had to work on cycling everything separately, so that our four chambers could inflate at different times and intervals so as to have four separate compartents that adjusted according to the patients head position. This was done using the solenoids from previous posts alongside the transistor op-amp power circuit from previous posts as well. More specifically, we used the op-amp transistor circuits that could cycle on and off based on voltage from the mbed, in order to cycle the solenoids between on and off. Once this was doable, we then were able to use our pressure sensor grid to measure the position of the head, and only cycle on the solenoids of the compartements corresponding to that position.
The last thing we wanted to work on, was something we realized right before the demo date, and that was that the pressure sensors will work differently depending on the air pressure currently in the pillow (if it’s more inflated, they will be more responsive than if less). We realized that this could be done efficiently through using an inflation coefficient that tracked how inflated the pillow was (based on intervals of time inflating or deflating). With this done, we then calculated the expected pressure when nothing was pressing on at these air pressure levels, and if the values were different, the head was pressing and we were able to know that someone was laying on the specific part.
With all of this done, we finished our reach demo!